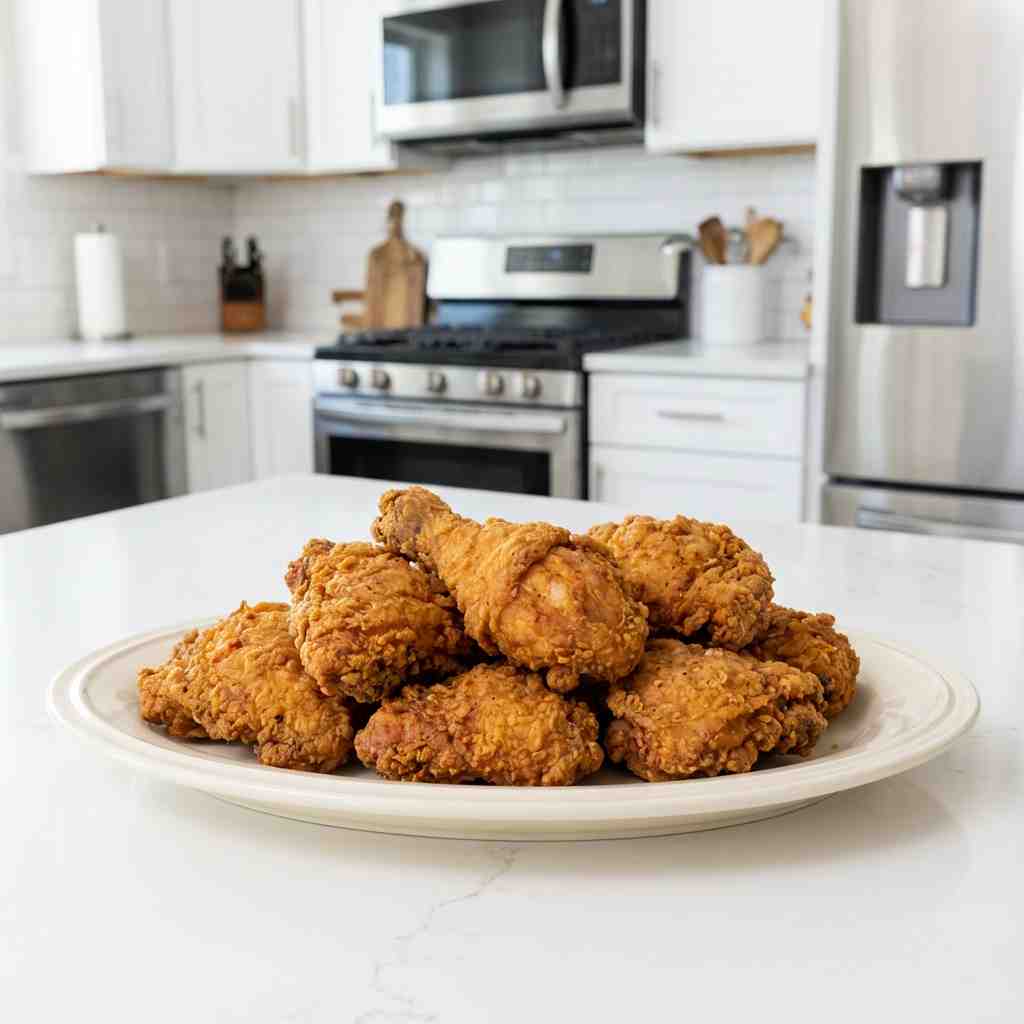
Get ready for the crispiest, juiciest, most flavorful fried chicken you’ve ever made at home! This Amish Fried Chicken recipe uses a simple buttermilk brine and a perfectly seasoned flour coating to create an irresistible golden crust that shatters with every bite, revealing tender, juicy meat inside. It’s a weekend project worth undertaking for a truly special and satisfying meal.
Table of Contents
Why You Will Love This Recipe
This recipe takes me back to the county fairs and church picnics of my childhood, where the scent of frying chicken would draw a crowd. An older gentleman who ran a food stand shared his secret: a long soak in seasoned buttermilk. That patience is the key to chicken that’s flavorful through and through. This recipe is a tribute to that wisdom, turning a simple technique into something extraordinary.
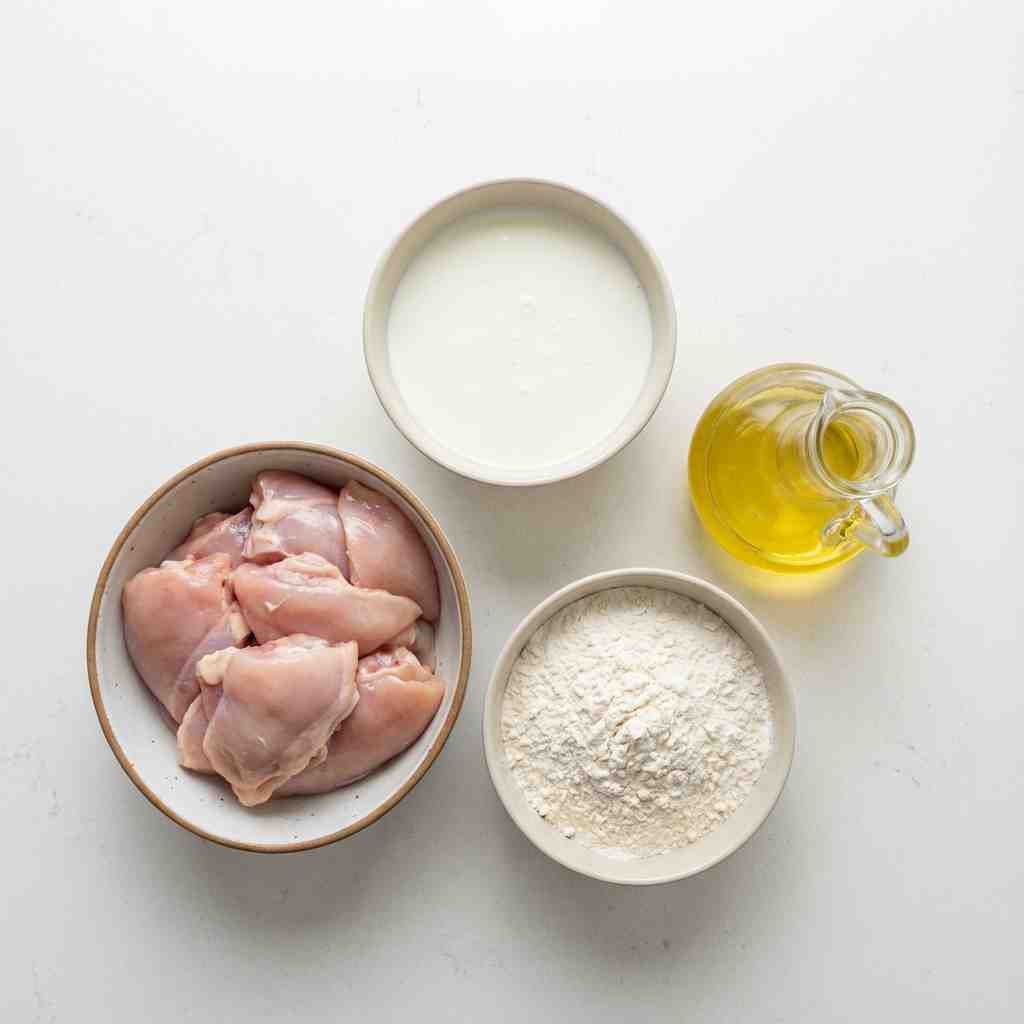
Ingredients
Here is what you’ll need to make this fried chicken:
For the Buttermilk Brine:
- 3-4 lbs bone-in, skin-on chicken pieces (thighs, drumsticks, breasts, wings)
- 3 cups buttermilk
- ¼ cup hot sauce (like Frank’s RedHot)
- 2 tablespoons kosher salt
- 1 tablespoon black pepper
- 2 teaspoons garlic powder
- 2 teaspoons paprika
For the Seasoned Flour Coating:
- 3 cups all-purpose flour
- ½ cup cornstarch
- 2 tablespoons garlic powder
- 2 tablespoons onion powder
- 1 tablespoon paprika
- 1 tablespoon kosher salt
- 2 teaspoons black pepper
- 1 teaspoon cayenne pepper (optional, for heat)
For Frying:
- Vegetable oil, peanut oil, or shortening (enough for 2-3 inches depth in your pot)
Step-by-step instructions for making the recipe
Follow these simple steps for a perfect result every time:
- Brine the Chicken: In a large bowl or resealable bag, whisk together the buttermilk, hot sauce, salt, pepper, garlic powder, and paprika. Add the chicken pieces, ensuring they are fully submerged. Cover or seal and refrigerate for at least 4 hours, but preferably overnight (12-24 hours).
- Prep to Fry: At least 30 minutes before frying, remove the chicken from the refrigerator to take the chill off. In a large, shallow dish (like a 9×13 pan), whisk together all the ingredients for the seasoned flour coating.
- Dredge the Chicken: Remove one piece of chicken from the buttermilk brine, letting the excess drip off. Dredge it thoroughly in the seasoned flour mixture, pressing firmly to ensure an even, clumpy coating. Place the coated piece on a wire rack set over a baking sheet. Repeat with all chicken pieces. Let the coated chicken rest on the rack for 15-30 minutes. This helps the coating set and adhere.
- Heat the Oil: While the chicken rests, pour oil into a large, heavy-bottomed Dutch oven or cast-iron skillet to a depth of 2-3 inches. Heat over medium-high heat until the oil reaches 325°F – 350°F (163°C – 177°C). Use a deep-fry or candy thermometer for accuracy.
- Fry the Chicken: Carefully lower 3-4 pieces of chicken into the hot oil, skin-side down, without crowding the pot. The oil temperature will drop; adjust the heat to maintain a steady temperature between 300°F – 325°F (149°C – 163°C).
- Cook Until Golden and Cooked Through: Fry for 12-20 minutes, turning occasionally, until the crust is deep golden brown and the internal temperature reaches 165°F (74°C) for white meat and 175°F (79°C) for dark meat. Cooking times vary by size: wings (12-15 min), drumsticks (14-16 min), thighs (16-18 min), breasts (18-20 min).
- Drain and Rest: Use tongs or a spider strainer to transfer the fried chicken to a clean wire rack set over a baking sheet (not paper towels, to keep the bottom crisp). Let it rest for 10-15 minutes before serving. This allows the juices to redistribute.
Amish Fried Chicken
Ingredients
Equipment
Method
- Brine chicken: Combine buttermilk, hot sauce, and spices. Submerge chicken, cover, and refrigerate for at least 4 hours, preferably overnight.3-4 lbs bone-in, skin-on chicken pieces, 3 cups buttermilk, ¼ cup hot sauce, 2 tablespoons kosher salt, 1 tablespoon black pepper, 2 teaspoons garlic powder, 2 teaspoons paprika
- Remove chicken from fridge 30 min before frying. In a shallow dish, whisk all seasoned flour coating ingredients.3 cups all-purpose flour, ½ cup cornstarch, 2 tablespoons garlic powder, 2 tablespoons onion powder, 1 tablespoon paprika, 1 tablespoon kosher salt, 2 teaspoons black pepper, 1 teaspoon cayenne pepper
- Dredge each chicken piece in flour, pressing firmly. Place on a wire rack and let rest for 15-30 minutes.
- Heat 2-3 inches of oil in a Dutch oven to 325°F – 350°F (163°C – 177°C).vegetable, peanut oil, or shortening
- Fry chicken in batches (do not crowd) for 12-20 minutes, maintaining oil temp at 300°F – 325°F, until golden brown and cooked through (165°F for white meat, 175°F for dark).
- Drain chicken on a wire rack. Let rest for 10-15 minutes before serving.
Notes
Faq
Why is my coating falling off the chicken?
A falling coating is usually due to moisture or not letting the coated chicken rest. Ensure you let the excess buttermilk drip off well before dredging, press the flour on firmly, and let the coated chicken rest for 15-30 minutes before frying. This allows the coating to hydrate and adhere.
Can I bake this chicken instead of frying?
For a baked “fried” chicken, prepare as directed. Preheat your oven to 400°F (200°C). Place the coated chicken on a wire rack over a baking sheet. Spray or brush generously with oil. Bake for 40-50 minutes, flipping halfway, until golden and cooked through. It won’t be as crispy as deep-fried, but it’s a great alternative.
What’s the best oil and how do I dispose of it?
Peanut oil and vegetable shortening are excellent for high-heat frying with neutral flavor. Canola or vegetable oil also work well. To dispose of cooled oil, never pour it down the drain. Strain it through a coffee filter into its original container or a sealable jar and discard with your trash, or find a local recycling center that accepts cooking oil.